
how do I recover a lost plan?
What to do if you lose a plan
Here at PlanUp we pride ourselves on the reliability of the software and the safeguards in place should PlanUp crash.
On the odd occasion PlanUp crashes, you should re-open PlanUp and the plan will re-open exactly as it was before the crash.
However, on the rare occasion that this does not happen, you can recover the plans yourself from the auto-saves without having to contact us first.
This can also be used if you are using PlanUp via another app to recover plans where the other app can no longer find the plan drawn.
IMPORTANT: Auto-saves are only kept on the iPad for 2 weeks. After this time they are automatically deleted and cannot be recovered.
How do I find a lost plan?
If you do lose a plan it does not matter if you are/were online or offline when working on the plan. All that matters is that you are using the same device that the plan was drawn on.
NB: All screenshots below are from a Windows PC. The PlanUp screens are identical regardless of the type of device that you are using apart from any surrounding border that is put on by the operating system.
Step 1: Open PlanUp and Go Offline
Open PlanUp on the device that you used to draw the plan. If you normally use PlanUp via a third party app you will need to open PlanUp directly, not via the other app.
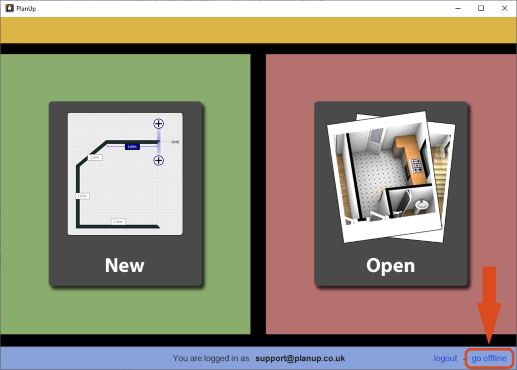
You will now see a screen similar to that below.
If you are online, make sure that you go offline by tapping go offline at the lower right of the screen (highlighted below). If it says go online you are already offline.
Step 2: Access the Auto-save File List
This step will vary be slightly depending on whether PlanUp is being accessed:
Customers using PlanUp via a third party app
To access the auto-save file list:
- Tap Open to get to a screen similar to that shown below:
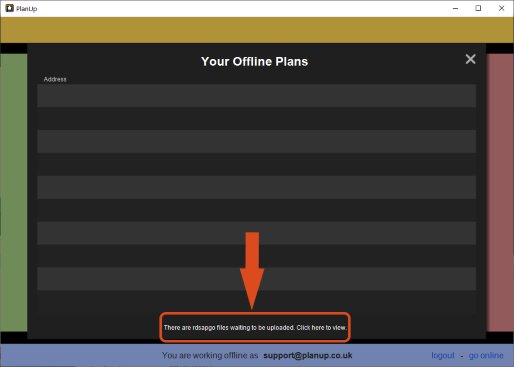
- This list shows any plans started directly in PlanUp, but have not yet been uploaded to PlanUp servers.
- If you have plans that were started via a third party app but not finished, the white text at the bottom will read: There are XXXX files waiting to be uploaded. Click here to view. (XXXX being the name of the third party app/company providing party app). Tap here to see these plans.
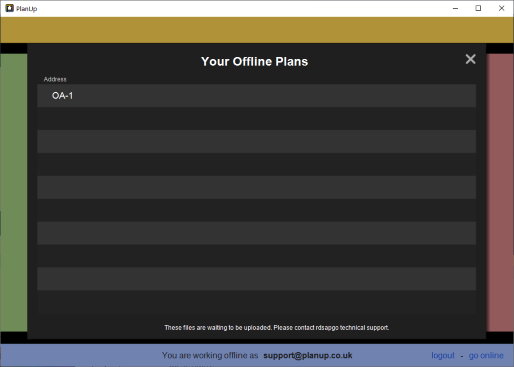
NB: If you do not have any third party app plans to upload the text will be different. Please see Customers using PlanUp directly for details.
- If the missing plan is not one of these, then tap on the white text at the bottom reading These files are waiting to be uploaded. Please contact XXXX technical support
- Any auto-saves will be listed here in date and time order with the most recent at the top
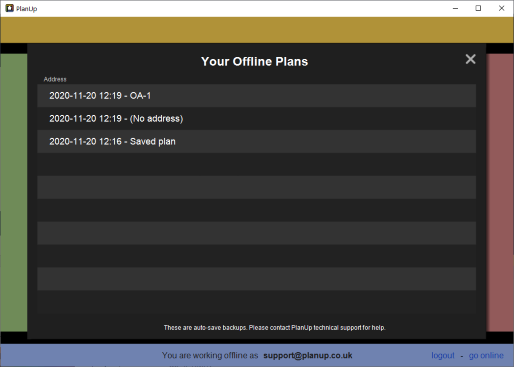
The auto-saves present will display the date and time that the auto-save last took place followed by the first line of the address if one had been entered. If no address had been entered it will say (No address) instead.
If you had saved the plan but cannot see the first line of the address, remember to check any that have no address against them.
Now move on to Step 3: Open and Save the Auto-save.
Customers using PlanUp directly
To access the auto-save file list:
- Tap Open to get to a screen similar to that shown below:
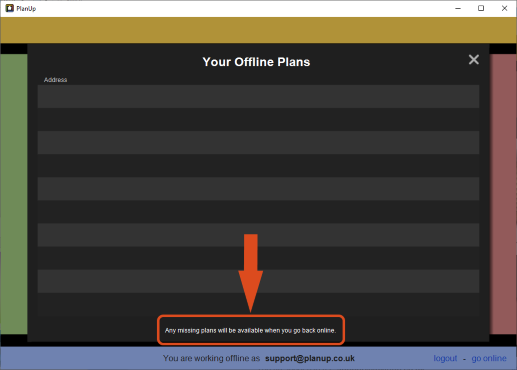
- To access the auto-save list tap where it says Any missing plans will be available when you go back online (highlighted above)
- The list will then change to look something like this:
- Any auto-saves will be listed here in date and time order with the most recent at the top.
The auto-saves present will display the date and time that the auto-save last took place followed by the first line of the address if one had been entered. If no address had been entered it will say (No address) instead.
If you had saved the plan but cannot see the first line of the address, remember to check any that have no address against them.
Now move on to Step 3: Open and Save the Auto-save.
Step 3: Open and Save the Auto-save
Once you have identified the relevant auto-save from the list, simply tap it to open it.
Doing this will create a whole new plan and leave the selected auto-save as it was in case there are any further problems so you still have the same auto-save to go back to.
You can now continue working with the plan as normal.
When you have finished the plan, tap Finish and enter the address as you normally would.
If you use PlanUp via a third party app, please go to Adding Plan Back Into Your Third Party App to see how to link the plan back to your survey.
If you are a direct user of PlanUp you can now continue working with the plan as normal.
When you have finished the plan, tap Finish and enter the address as you normally would.
Adding Plan Back Into Your Third Party App
If you use a third party app, once a plan is recovered you will most likely need to put the plan back into that app.
To do this, once you have opened the correct auto-save:
- Tap on the iPad Home button to return to the iPad home screen.
- Now open the third party app, and open the relevant survey.
- Tap the relevant option to open PlanUp.
- PlanUp will now open showing the following message:
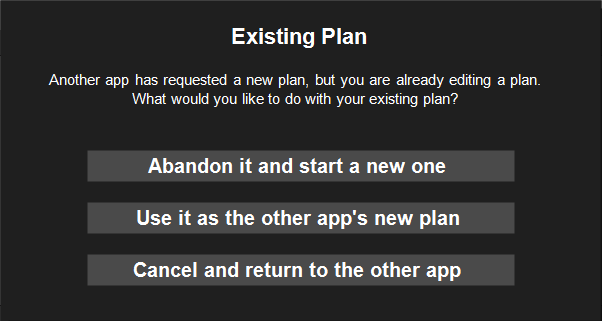
- Select the second option: Use it as the other app’s new plan, the screen should then show as it was in PlanUp before you returned to the iPad home screen.
- You can now complete any additional work for the floor plan/survey as normal.