drawing rooms
Here you can find out how to:
Starting a new plan
There are four steps to follow for drawing each room. Apart from a few exceptions, best practise is to follow the four steps in order. Working through each room in the same order every time will soon become second nature.
The following sections will give you the basic ideas for drawing rooms and creating a plan. For a complete run through drawing an example plan check out Getting Started Guide available from:
PlanUp: Support Home
It is best practise to complete each room fully before moving on to the next room.
Drawing the first room
As you have different input options available on a desktop/laptop compared to a tablet, the recommended methods are different depending on what type of device you are working on.
Recommended desktop/laptop method
Recommended tablet method
Using Imperial or Metric Measurements - By default PlanUp measurements will be entered using metric measurements, click here to see how to change this
Recommended desktop/laptop method
Once you have tapped on new plan you will see the following:
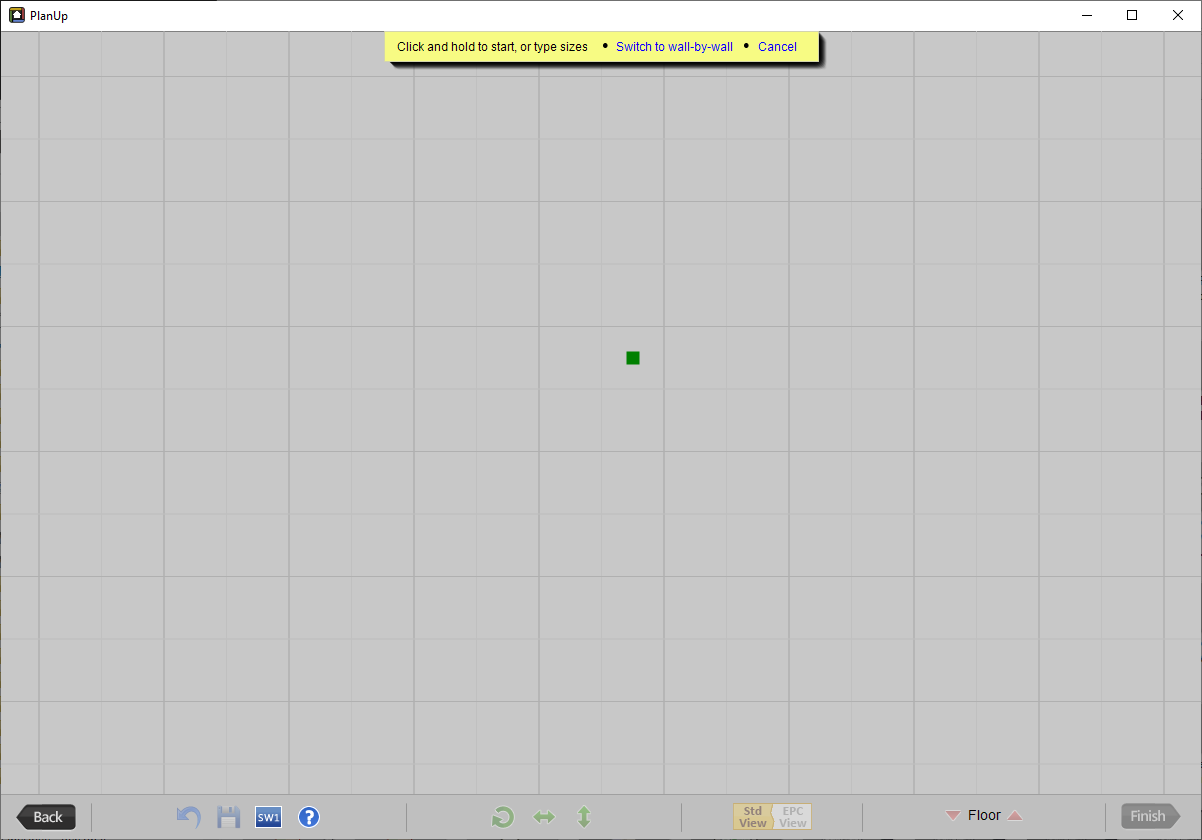
You can set a room size simply by typing the required measurements using your keyboard.
For example, to create a room that is 2.00m wide by 2.50m deep, type 2.00 (width measurement) and hit x or Enter to move onto the next measurement. Now type 2.50 (depth measurement). As seen in the screen snip below the measurements you type will appear in the yellow banner at the top of the PlanUp window:

If you make a mistake simply use the backspace button to delete the mistake and then re-enter as required.
Now press Enter to confirm these measurements and the yellow banner will update to the following:

On moving your mouse you will see an outline of the room appear, similar to the below:
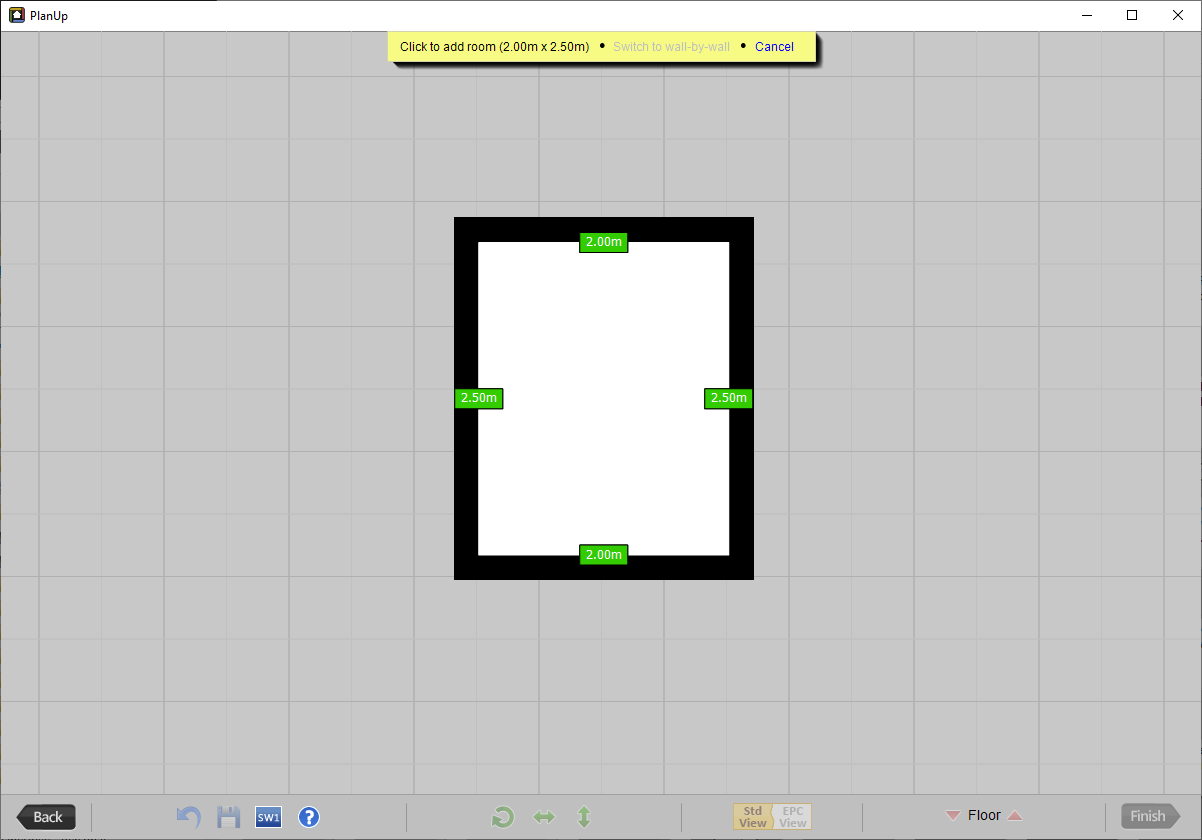
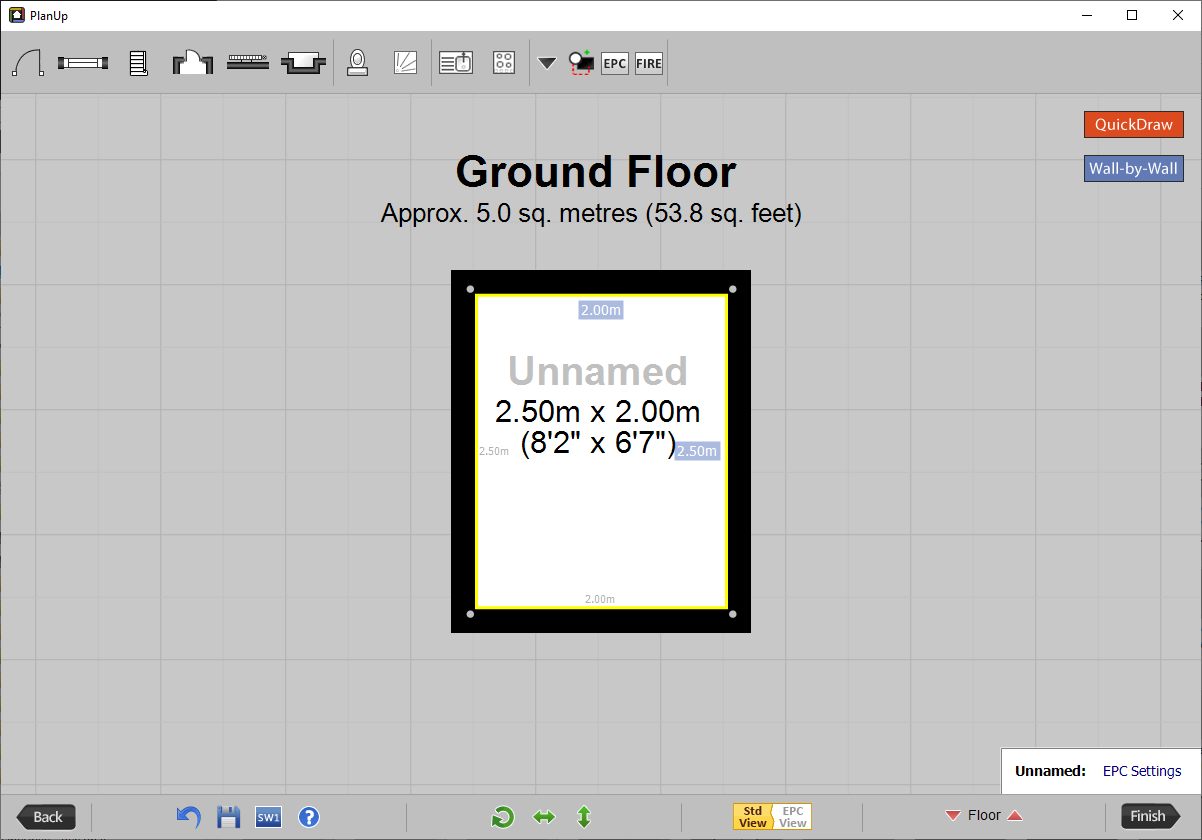
Position the room and tap to add it when ready:
If the room is not a regular shape you can shape rooms as needed: re-shaping rooms
NB: If you want to change the measurement units between metric and imperial please see Using Imperial or Metric Measurements for information on how to do this.
Recommended tablet method
Once you have tapped on new plan you will see the following:
Tap on the screen and drag to create a room (don’t worry about the measurements yet), release to finish.
You will now have a screen similar to the below (The measurements on the room you have drawn may differ to our example):
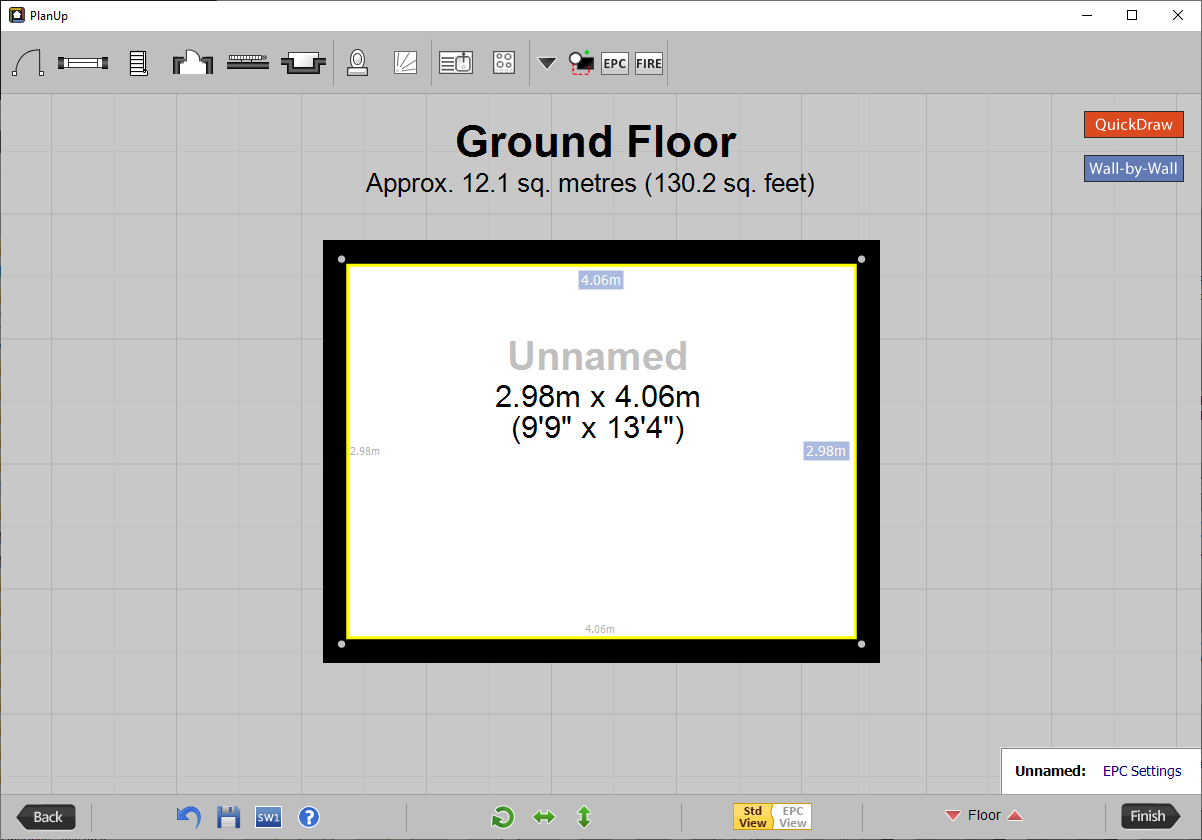
Now to set the correct measurements. For this example we want a room of 2.00m x 2.50m.
Tap on the blue measurement box on the top wall. You will now get a number pad on the right hand side of the screen. Type 2 and tap Enter to set the measurement to 2.00m:
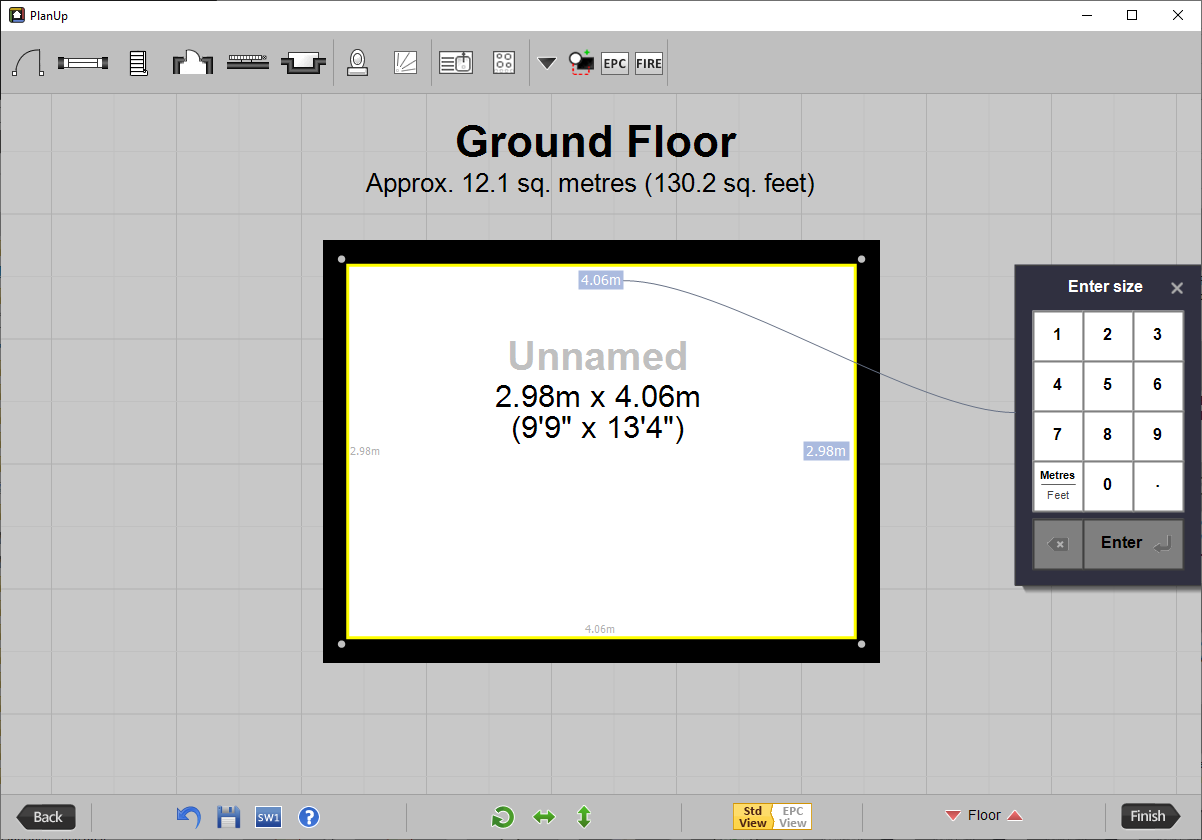
Now tap on the blue measurement box on the right hand wall and type 2.50 and tap Enter to set the measurement to 2.50m.
NB: If you want to change the measurement units between metric and imperial please see Using Imperial or Metric Measurements for information on how to do this.
The room is now the correct size.
If the room is not a regular shape you can shape rooms as needed: re-shaping rooms
Using Imperial or Metric Measurements
By default PlanUp measurements will be entered using metric measurements, but you can switch to use imperial if you prefer. Should you need to change the guideline units between metric and imperial this can be done by tapping on the Metres/Feet button on the number pad:
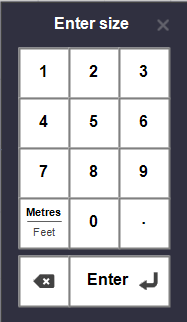
You can open the number pad by tapping on any measurement in a blue box in the room currently selected.
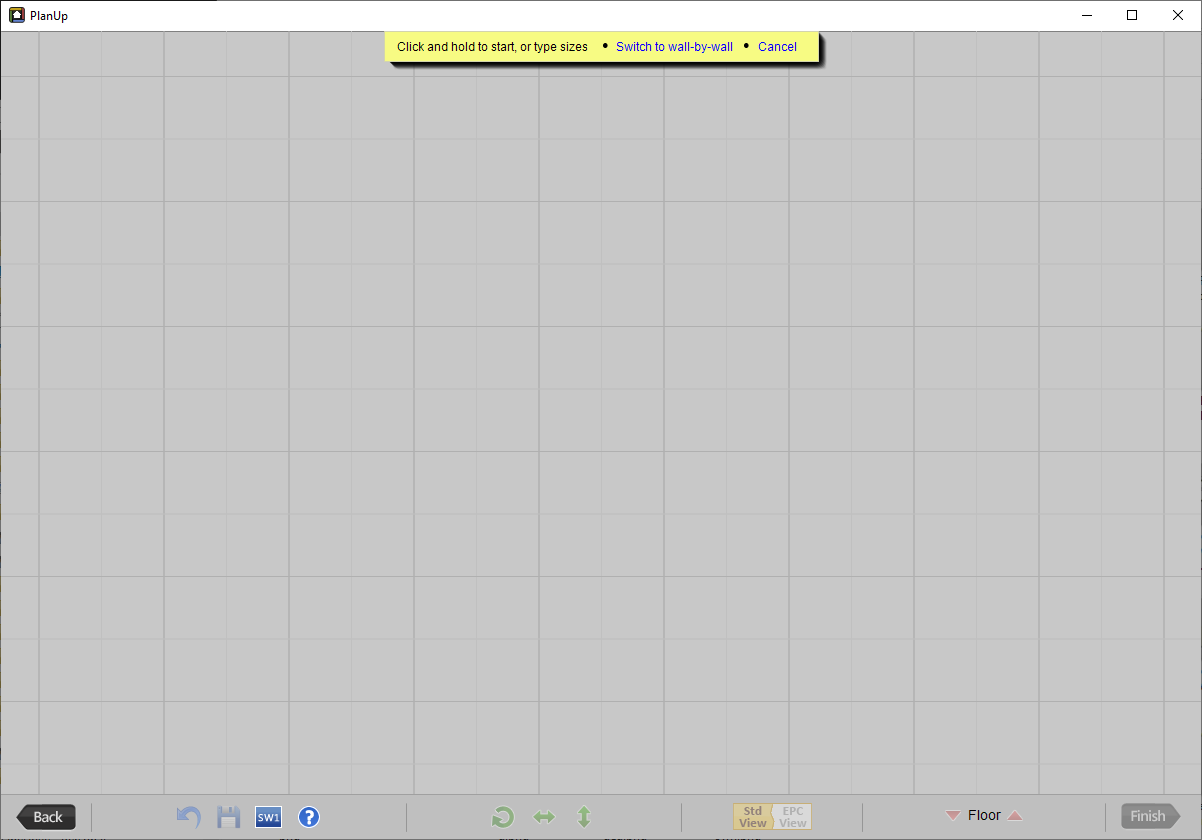
If a room has not yet been drawn, simply tap and drag to create a basic room. This room can then either be adjusted for the first room or deleted to start again.
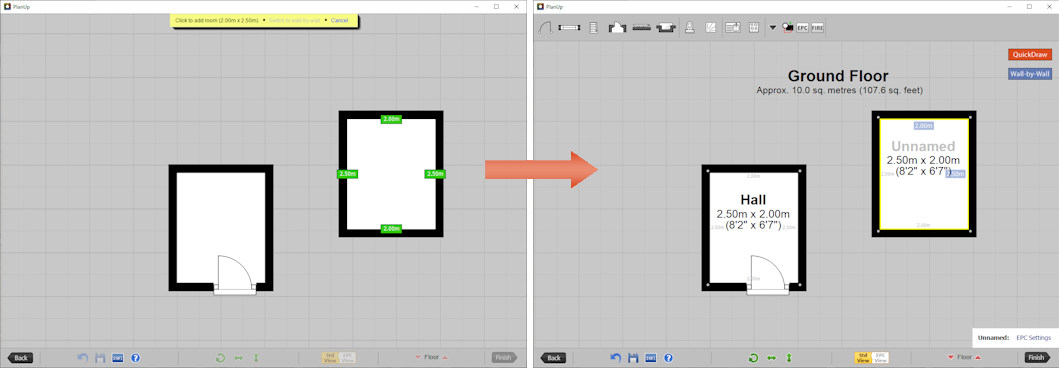
Adding another room
Once you have completed your first room you are ready to move on to the next.
It is highly recommended completing each room fully before moving on to the next room.
There are a number of options for how to draw the next room:
Option 1: QuickDraw - with measurements (desktop/laptop only)
This is the method used in the recommended desktop/laptop method above.
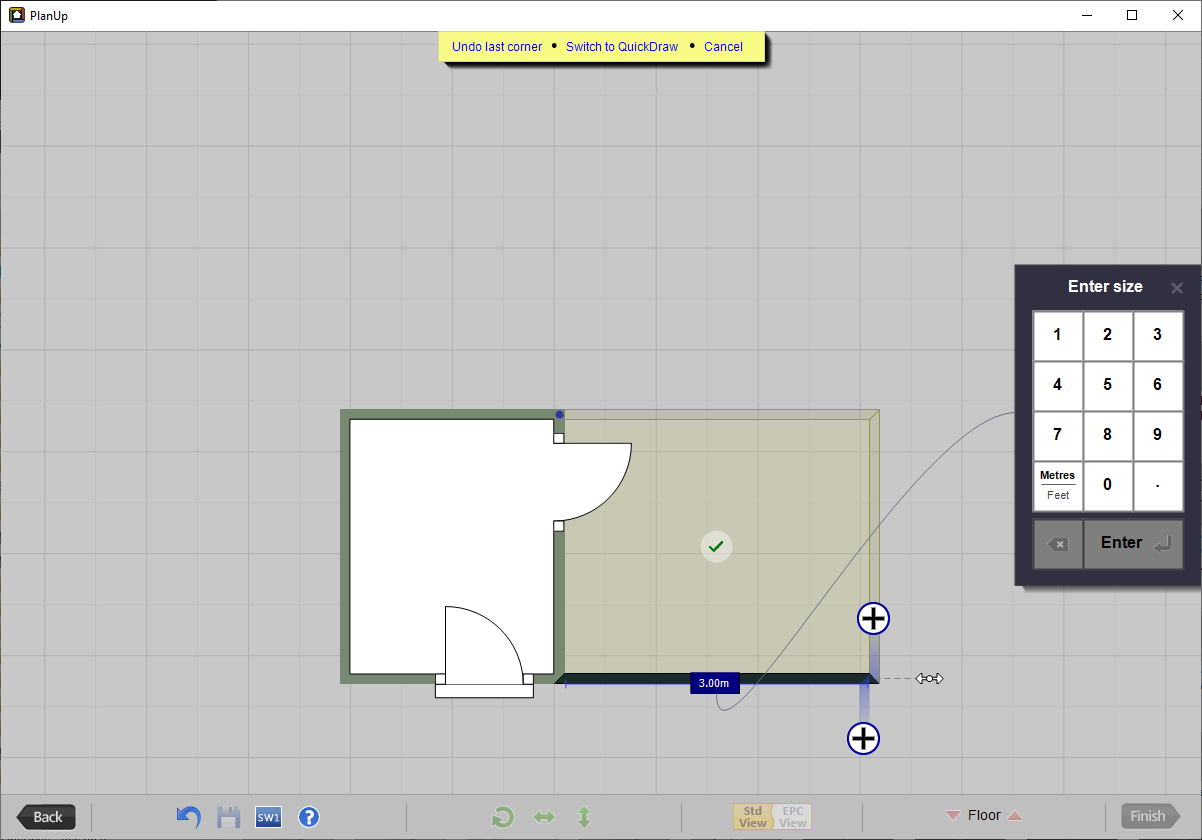
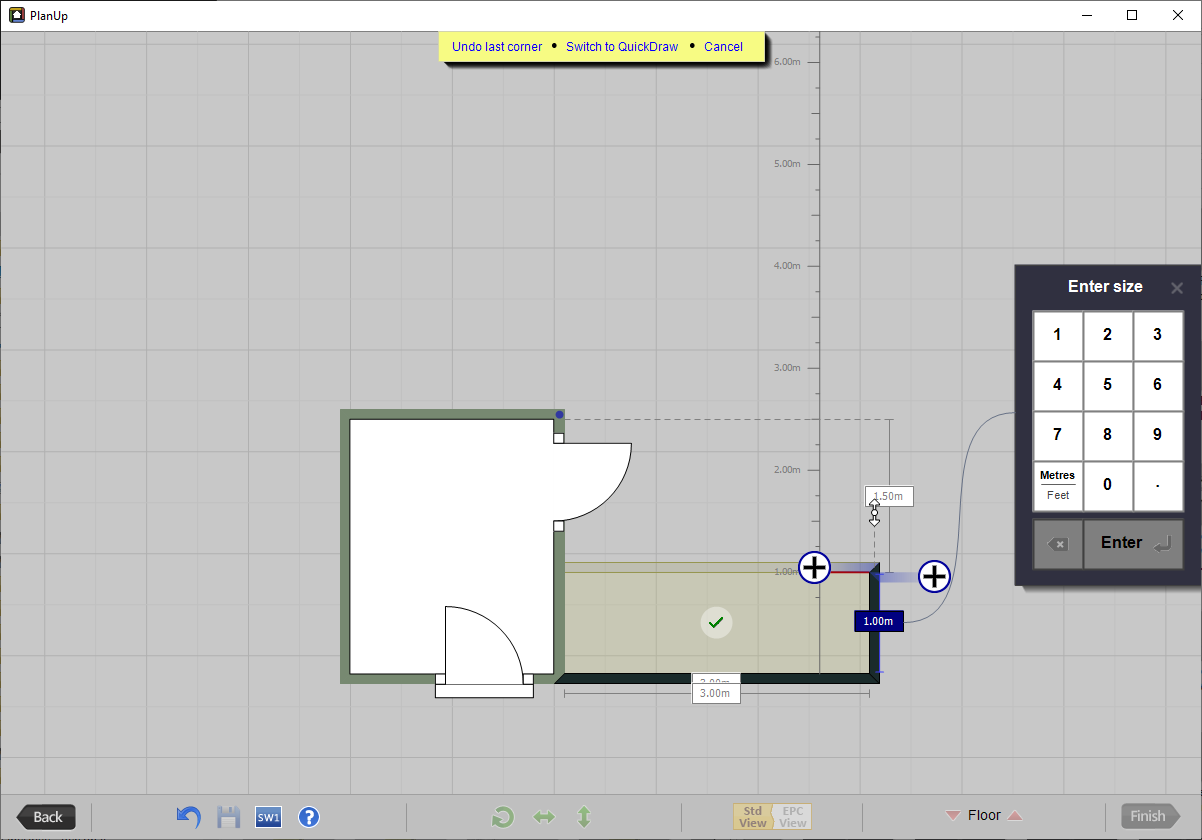
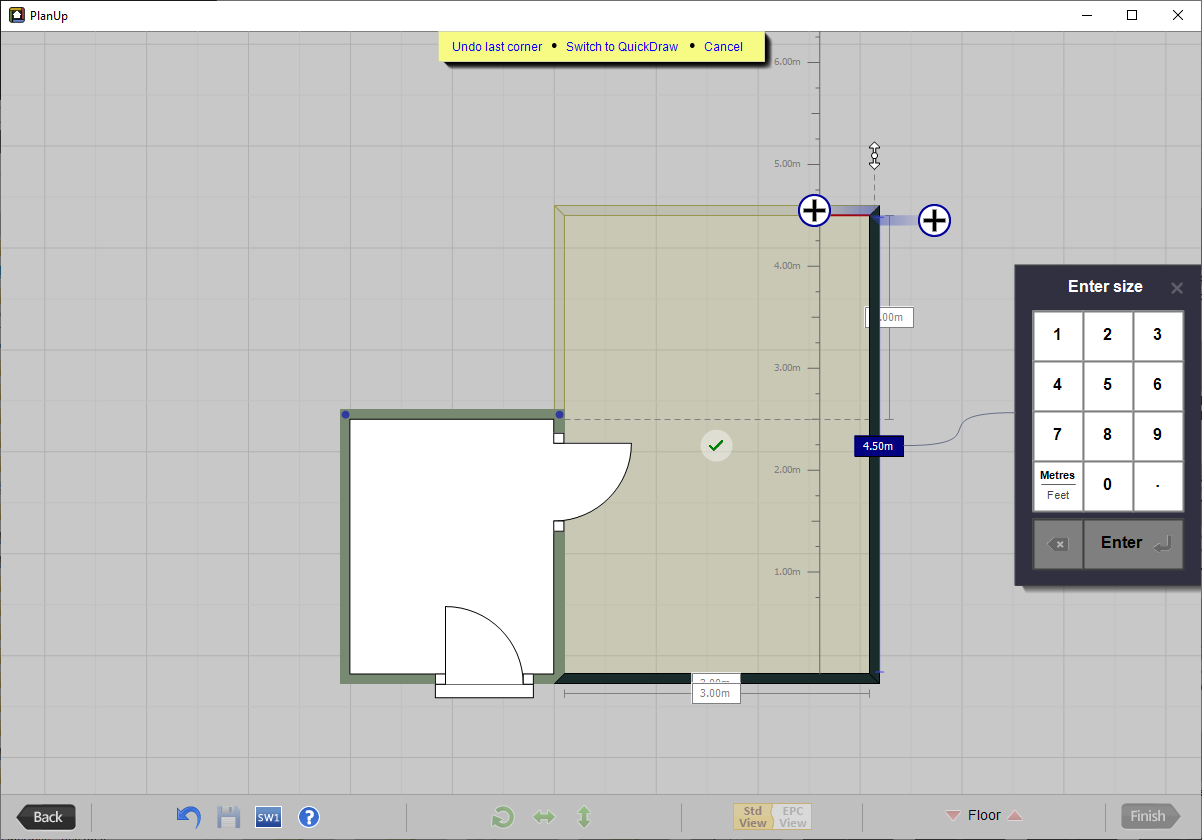
Activate the QuickDraw (by tapping on the orange QuickDraw button in the top right or by tapping Q on your keyboard), enter the measurements (remember, width x depth), press enter and tap to add the room in the appropriate place.
One important additional bit of functionality is where you can add the room. You can simply add the room to the existing room, but the room does not have to be added as a simple rectangular shape. As well as being able to place it next to existing rooms, you can:
- Wrap it round any existing rooms
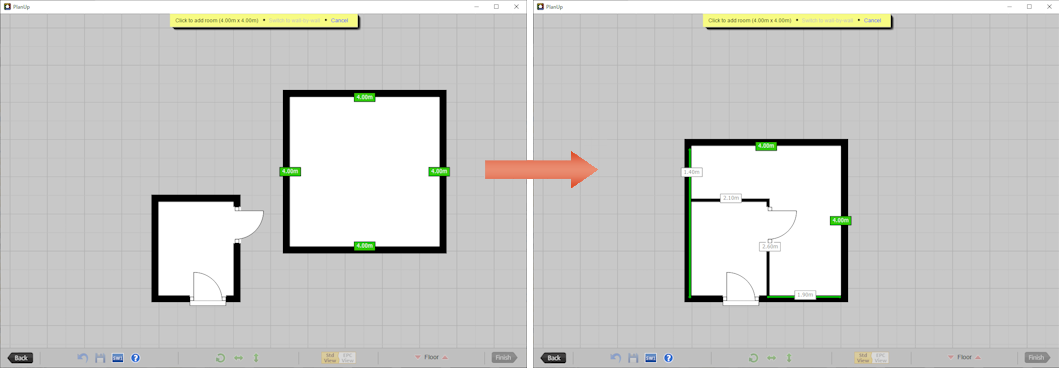
- Place it within the existing room
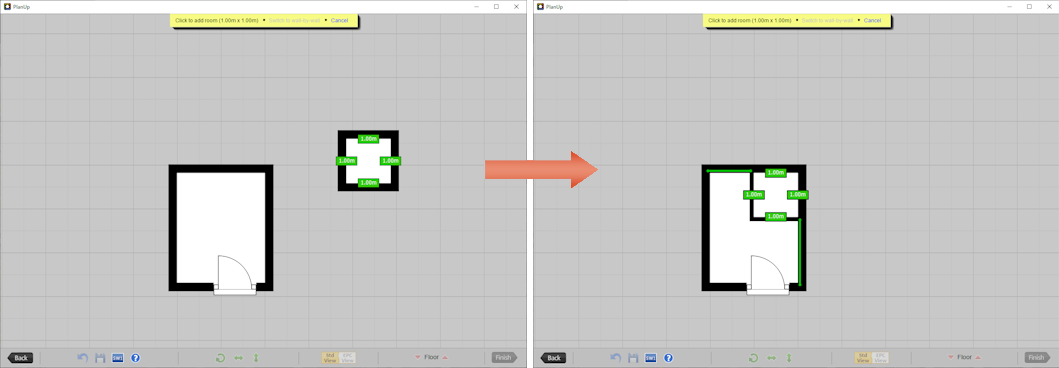
- Add it as a completely separated room to create outbuildings
In each case simply line the room up as required and then tap to add.
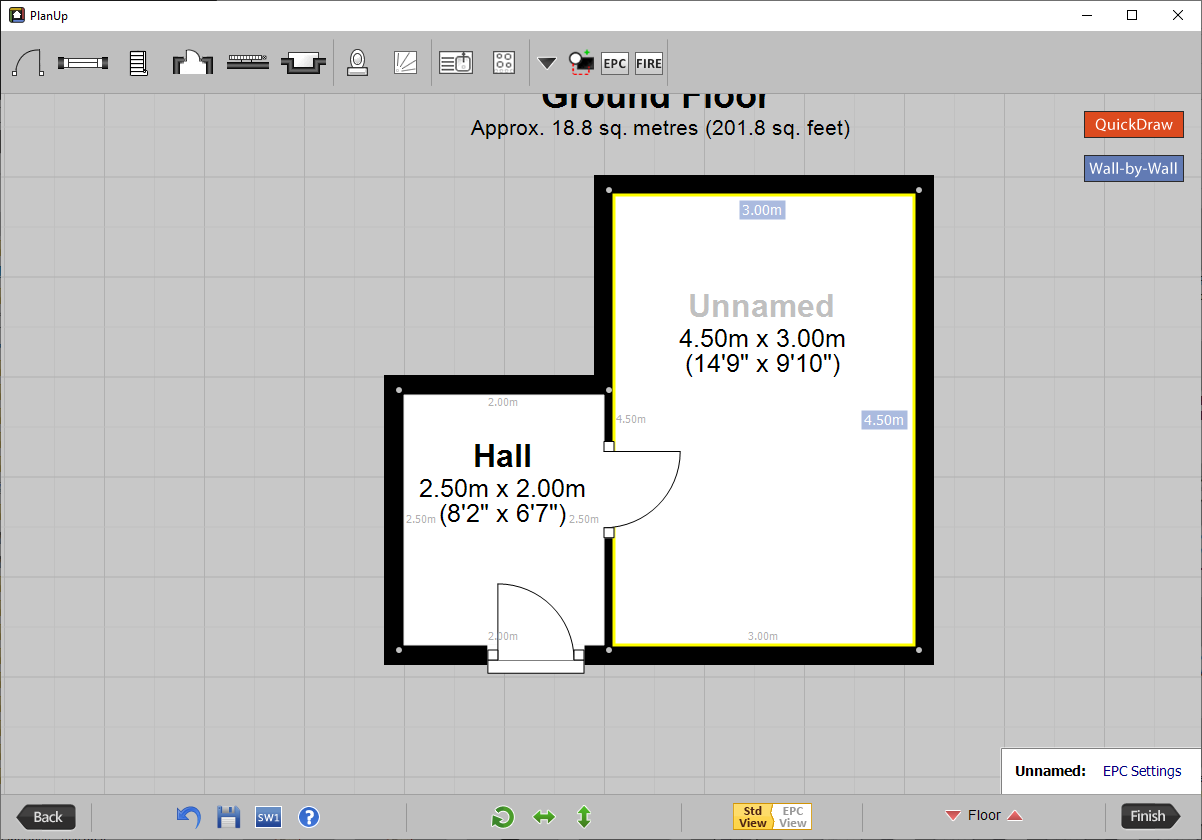
You can now proceed with this room in the same fashion as the first room.
It is highly recommended completing each room fully before moving on to the next room.
Option 2: QuickDraw - not using measurements
This is the method used in the recommended tablet method above i.e. adding a basic room and then re-sizing it.
As with Option 1: QuickDraw - with measurements, you can add the basic room next to, wrapping around or inside existing rooms, or you can add a completely separate room if required.
Once the room has been added you can re-size it by entering the measurements as described in the recommended tablet method or by dragging the walls to size.
Option 3: Wall by Wall
NB: Please note that you cannot use this method to draw a room within a room as you can with QuickDraw.
First of all tap on the blue Wall by Wall button towards the top right corner. You will see the top toolbar change to the following yellow banner:

Choose a common wall between the rooms to start from and tap on this wall - in this example we will use the right hand wall. You will now see a screen similar to the following:
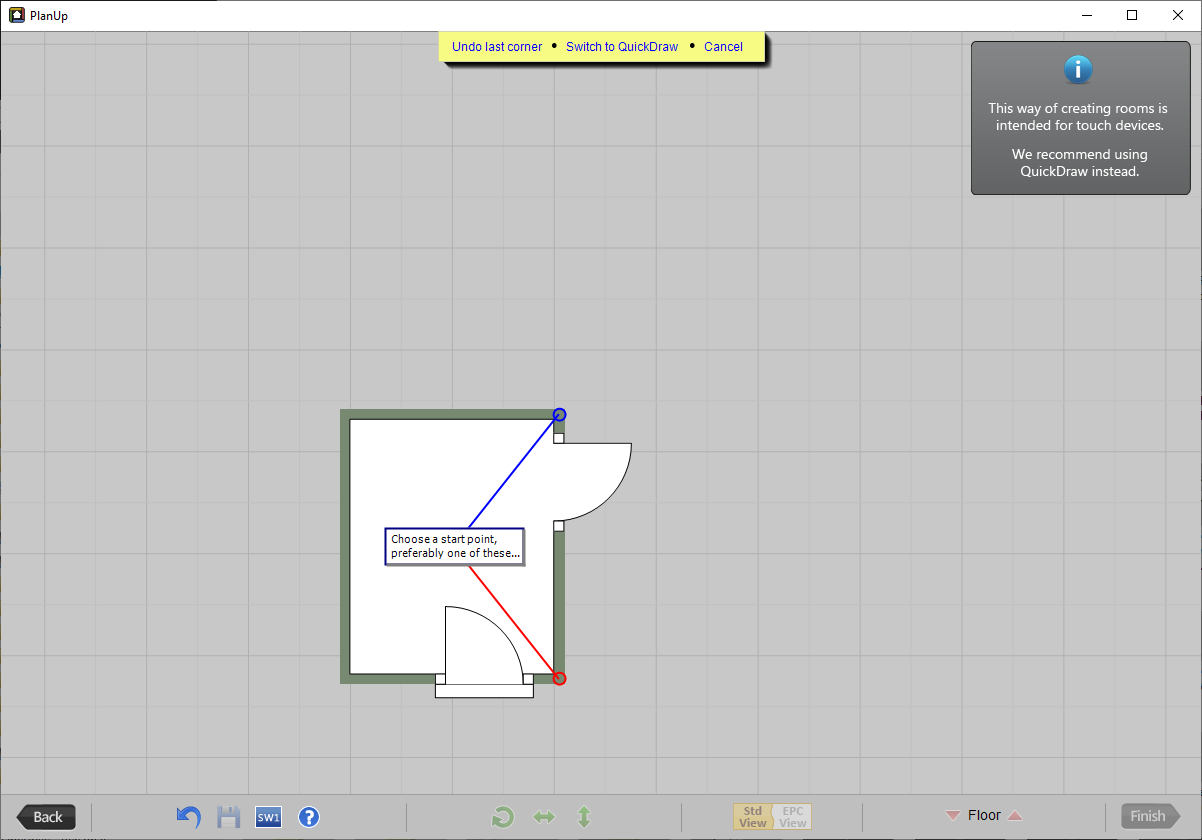
Notice that there is a button in the bottom right corner of the window ...or create a quick room. If you are further into the plan there is the possibility this will show you the option you want in which case you can tap to complete the room. The majority of the time this will not be the case so tapping on this button now will not save you time. More on this later.
As directed, select one of the suggested starting points. For this example we will start from the red point. Once you have selected the starting point, a 1 metre wall will be added, similar to the below:
NB: If you start from the red point the software will expect the room to be drawn in an anti-clockwise direction. If you start from the blue point the software will expect you to draw the room in a clockwise direction.
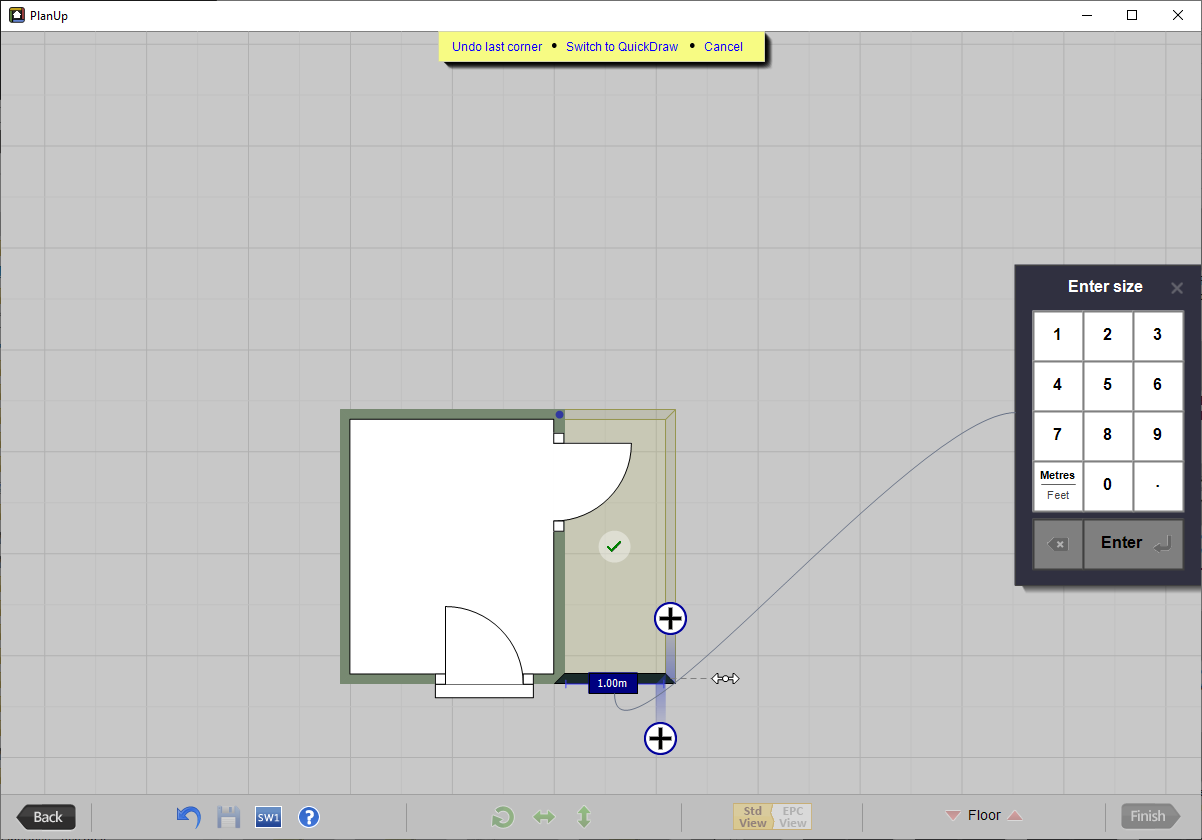
Notice there is now a ghost image of a suggestion the software is making for the room it thinks you may be trying to create with a green tick in the middle. If you are further into the plan there is the possibility this option will be what you want, in which case you can tap the green tick accept the suggestion and complete the room. Most of the time this will not be the case so tapping on this button now will not save you time.
You can now either:
- Tap on the double headed white arrow and drag the wall to the correct length.
- Use the number pad (on screen or on your keyboard) to type the measurement and tap enter to confirm. This will draw the wall to the required length.
If you make a mistake whilst drawing the room, it can be undone by pressing the undo button ( ) on the bottom toolbar or by selecting undo last corner from the yellow banner at the top of the screen.
To create the next wall, tap on one of the blue circles with a ‘+’. This will create a 1 metre wall similar to when you chose the starting point of the first wall.
Now drag or type the measurement as before to get this wall to the correct size.
Notice now that the ghost image suggestion has changed the suggestion that was made previously:
- If this suggestion is now showing what you want, then simply tap the green tick to create the room.
- If the suggestion is not showing what you want, create the next wall in the same way and keep going until the suggestion is correct to finish the room.
Re-shaping rooms
Once you have drawn a room, it is possible to re-shape it if necessary. Here are some helpful tips if you need to re-shape a room.
Wall splitter:
To split a wall (for instance to create an L-shaped room), tap on it to get open a pop-up menu similar to the below:
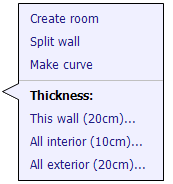
Tap where it says split wall on the menu to add the split. You can now drag the two sections of wall independently.
You can also double tap on a wall to add a wall split.
NB: Wall splits can not be used to remove part of a wall. If you need to make an opening please use the opening option from the doors menu. See Toolbar Reference (PDF) for a list of all tool bar options.
Make an Angled wall:
To turn any external corner into a diagonal wall tap on the corner (the grey dot where the wall changes direction to open the pop-up menu as shown below:
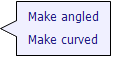
Simply tap where it says Make angled. If necessary you can change the angle of the wall by tapping on one of the new corners and dragging as desired to adjust it.
Curved Walls:
Tap on the corner or wall you want to make a curve.
If you tapped on the wall the same pop-up menu as indicated in the Splitting Walls section above appears.
If you tapped on the corner the same pop-up menu as indicated in the Make an Angled Wall section above appears.
On both of these menus is an option to Make curved. Tap on this to turn the wall/corner into a curve.
Navigating Around a Plan
As you proceed with drawing a plan, the screen will start to fill up. When you want to change the position of the plan on the PlanUp window simply tap anywhere on the plan (apart from the handles) and drag to move it to a more convenient position.
To zoom in or out of the plan:
- On a tablet use the usual pinch and pull
- Using on a desktop/laptop use the scroll wheel on your mouse.
- Use Ctrl and +/- in Windows.
- If using a laptop with a dual input touchpad you can use pinch and pull similar to what you would do on a tablet.